 | ||
| Color was added using a gradient in PS - see "The Colors" below Camera Settings: 65mm ISO: 160 Aperture: f7.1 Shutter: 1/250 sec |
Smoke photography is probably one of the closest thing to modern art in photography, except much cooler of course. You can control the lighting, the background, the source, and to some extent influence the smoke, but the images you end up with are still wild and abstract. And, as I found out, after looking at them for awhile you start to see all sorts of things; twisted monster dragons, old wizards, bicycles, Cheshire cats, futuristic warriors glaring at you, a mutated dog.. No kidding. Maybe it was the coffee..
Smoke really appears gray to our eyes and not incredibly photo inspiring, but it's like an onion.. You have to peel back several layers to get to the good stuff and both can hurt your eyes. Unless you wear contacts like I do, lucky me. Otherwise, by setting up just a few things it's pretty easy to get something, er, unique.
The source of the smoke?
Not by burning the house down. I started off with using candles, letting the burn for a few moments and then blowing them out. The problem with that, is that the smoke quickly dissipates when I blow them out and I can't immediately light, then blow them out again. They like to "recharge" I guess. So I used some incense sticks which last awhile, some go to 9 hours, and I can get a box of 60-80 for about $10 off Amazon. And it's much easier to frame, focus, chimp, and try it again. (Chimping refers to the comparison between the sounds and actions some make while reviewing images and those of an excited primate (Oooh! Oooh! Aaah!), or when a photographer is completely absorbed in the act of analysing, admiring or proudly displaying a shot to others. Just for those who don't talk to other photographers a lot, the things you learn...) Short answer, go for incense sticks, much easier.
Equipment I used
- A camera with manual mode (like my lovely Canon 7D)
- External flashgun with a wireless trigger or PC sync cord
- A snoot (basically something to control a beam of light without it going off to the sides, preferably black to absorb the light)
- Preferably a tripod, but not dependent on it if you're using incense smoke
- Remote shutter release if using a tripod would make your life easier as well
- A black background - non reflective
- Fire

I used two speedlights, with snoots on each of them, my camera on a tripod, and connected my computer to shoot tethered, which worked as a remote as well.
The setup is on the left, minus the computer and tripod. And the backdrop is black instead of white.
You can see the two flashes with snoots attached on either side of the subject, and the object in the middle being our smoke source.
The Settings: Controlling the Light
In order to get the most contrast for the smoke to stand out, you need a black background. And it really looks awful when it's reflective or you start to see part of it in the back of the picture so you want to make sure the light is not casting any light on the background. Also, you don't want any of the light to hit your lens as it'll create some lens flare which usually, but not always, is unwelcome. To do that, I put snoots or gobos on the lights - as seen in above diagram - to basically act as a funnel or tunnel to channel the light in a direct way. Like a laser. The spread is much smaller and keeps it off the background and lens.
Secondly, I don't want any ambient light so I could wait til it's evening/night and turn off all the lights, or use a high enough shutter speed to eliminate all ambient light. Basically underexposing the image until it's black and using the strobes to light up the image I want (and the only thing they light up is the smoke). I usually used around 1/150-1/250 for my shutter speed.
Because it'll be dark and your camera won't be able to focus, you will probably want to prefocus it, set it to manual, and have a higher aperture, I used an aperture setting between f7.1-11, but you can go higher up to 16 as well.
Since we're going for a black image, we don't need to worry about lighting as far as the camera is concerned so ISO 100-200 is good, lower is better.
For the speedlights, I play with the settings a bit. Usually, I go for 1/8th to /16th depending on how far away I set them.
Some other recommendations, though it's unusual for me to shoot in anything otherwise, shooting in RAW is good as it'll let you adjust lighting or noise more without as much damage to the quality of the image in PP (post-processing) which is good. I recommend shooting in RAW unless otherwise stated.
 | |
| Example of changing the hue in PS Camera Settings: 50mm ISO: 100 Aperture: f11 Shutter: 1/100 sec Flash output 1/16th |
Well, there are many things you can do as far as coloring. What I started with is changing the hue of the smoke in PS (photoshop), or changing the highlight/shadows to different temperatures in Lr.
Back to PS, I tried using a gradient which could be pretty cool. There's a good tutorial on that gradient with some examples at Yassine Hakimi's blog.
Another simple technique is simply inverting the image, just going into PS, do your normal light edit, and then invert it (control + I) which gives you some interesting colors.
 | |||
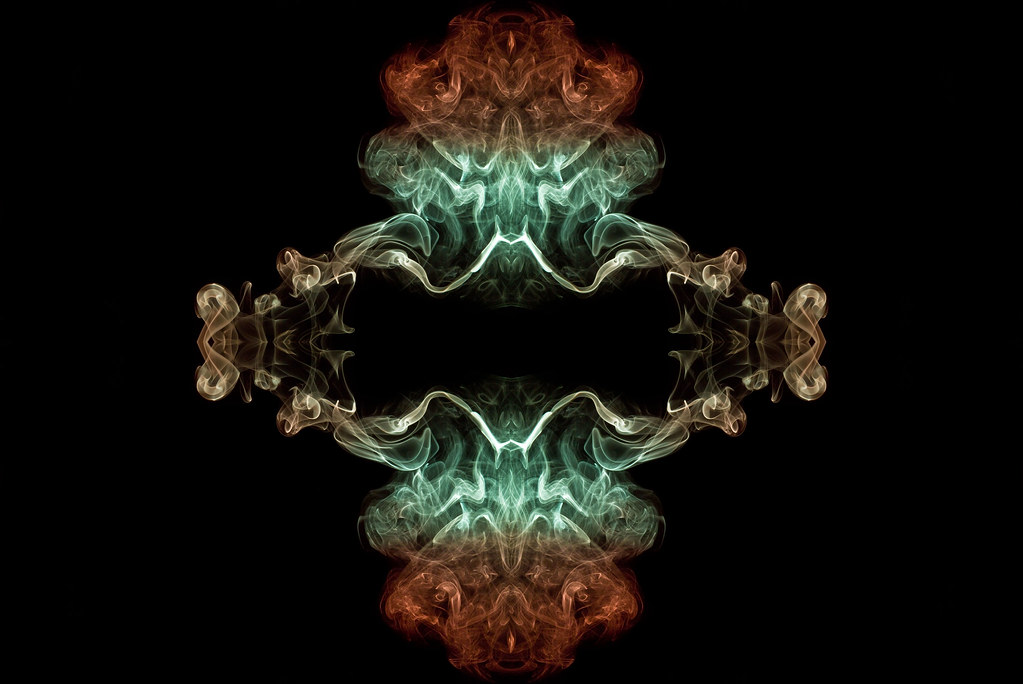
| Mix of two green gels on one flash with two orange gels stacked on the second flash. Flash output at 1/8 power and zoom set to 50mm with snoots on both. Camera Settings: 50mm ISO: 100 Aperture: f11 Shutter: 1/250 sec |
There are many more things you can do with smoke, in coloring and after effects, and I might talk about a couple of them later as there are several cool ones, but I'm going to end here with a couple of my favorite pictures from trying it out. Also, I strongly recommend checking out some of Graham Jeffery's work, he's been taking pictures of smoke for about 30ish years...Incredible art there.


This is incredible! I am really blown away by the beauty of these...and also, I am thinking you must be good at taking large family pictures...good to know...
ReplyDeleteAwesome work.
Thank you very much! If you like these, I would highly recommend taking a look at Graham Jeffery's work (link in the post), or the group pool on Flickr. There are some really talented people who would put mine to shame with theirs.
DeleteI have done some little work with people, so if you were wanting a family portrait feel free to shoot me an email. I normally just offer to do it for free since I do not have a reputation or previous clients to go by, and if you're happy with results you can give a donation as you feel. Again, thank you for the time to comment!